Milquetoast Process: Behind the Scenes Satori 2, MAKING A HUMANOID continued...
This post is a continuation of the silicone mask making process started in this previous post for the short film, Satori. This post will cover the remaining process of the clay mask sculpt, the resin mask negative mold, and the final silicone mask.
the Humanoid in full effect on set
PREAMBLE
This is the labor intensive portion, and the higher stakes half. The materials are trickier, and more costly. They take longer, and are the most frustrating. They're also the coolest.
Here we go...
Supplies:
- Plaster of paris head cast
- Petroleum jelly
- Oil based modeling clay
- Cellophane plastic wrap
- Aerosol acrylic sealer
- Polyurethane resin
- Polyurethane fiber
- Wood scraps
- Water based clay
- Release agent
- Paste wax
- Silicone
- Thickener
- Silicone pigment
- Flocking
- Various chip brushes
- Various mixing cups
- Nitrile gloves
STEP SIX: CLAY MASK SCULPT
This step is actually very straight forward. We rounded off the protruding ears of the plaster head mold from the previous steps, as well as any lumps from mold imperfections (these wouldn't be there if we did a better job in the first portion). We also shaved down the nose a bit so that when the final mask is made it will have a nice snug fit on Alex's face, and not flop around.
A very thin layer of petroleum jelly was applied to the plaster head before any sculpting to keep the dustiness down and allow the clay to actually adhere. From here, it was just as simple as sculpting the oil based clay atop the head into the look we wanted of the final mask.
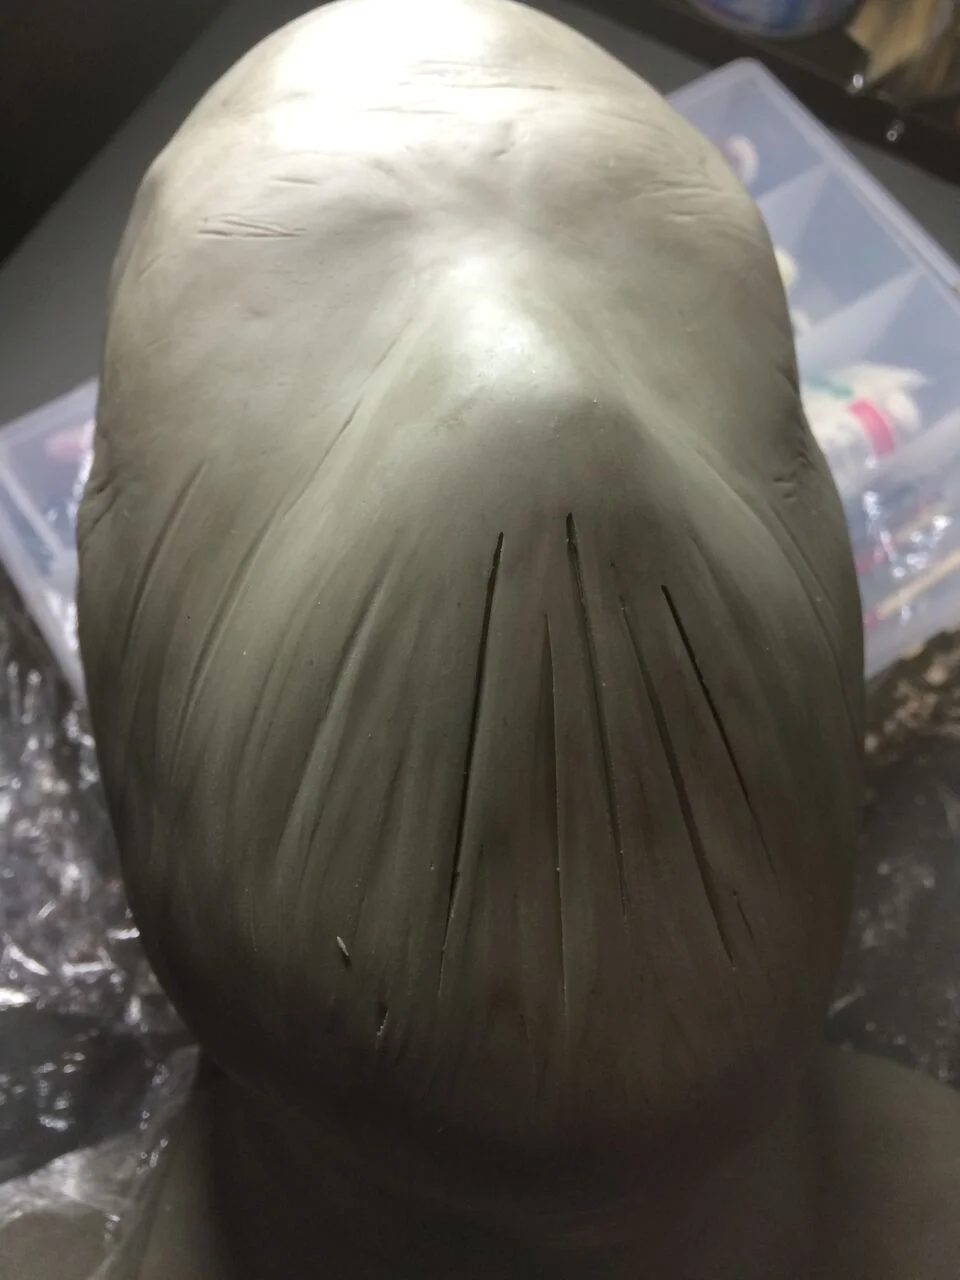
Laying the plastic wrap on the clay and drawing the wrinkles in with a dull pencil is about as easy as it gets. The difficult part is getting the clay absolutely smooth, as even the slightest imperfection will show.
STEP SEVEN: RESIN MOTHERMOLD
Now things start to get a little higher stakes, because if we botch something it's pretty much all the way back to step one. First we seal the completed sculpt with the acrylic sealer.
completed, sealed Humanoid mask sculpt
We decided to prepare the mother mold on the front side first because we knew we'd have to lay it horizontally and a small flat spot on the back will be a lot easier to fix than a mashed in nose.
So we gently laid the sculpt horizontally, face up, and stacked the wood blocks around the perimeter. The water based clay was then placed on top of the scraps of wood up to about the half way point. The clay should be nice and flush to the mask sculpt and also very flat.
water based clay wall around mask sculpt
Not pictured here is the need for a register of some kind. We just took a nice wide paper clip and dug several grooves into the clay. This will ensure the two halves fit together exactly and lock in place. You can see the results of this in the pictures ahead.
We sprayed the whole thing down with a liberal coating of the release agent. Following the instructions for the product we mixed our polyurethane resin and applied a thin coat without fiber to ensure we got all of the finer details from the sculpt. Then we mixed another batch adding the polyurethane fiber to it until we got a nice peanut-butter-y texture (adding less fiber and the resin will be too drippy but too much and it becomes brittle and less detailed). A first coat was applied, and set before a second coat to ensure proper thickness.
first half of the resin mold after both coats are applied
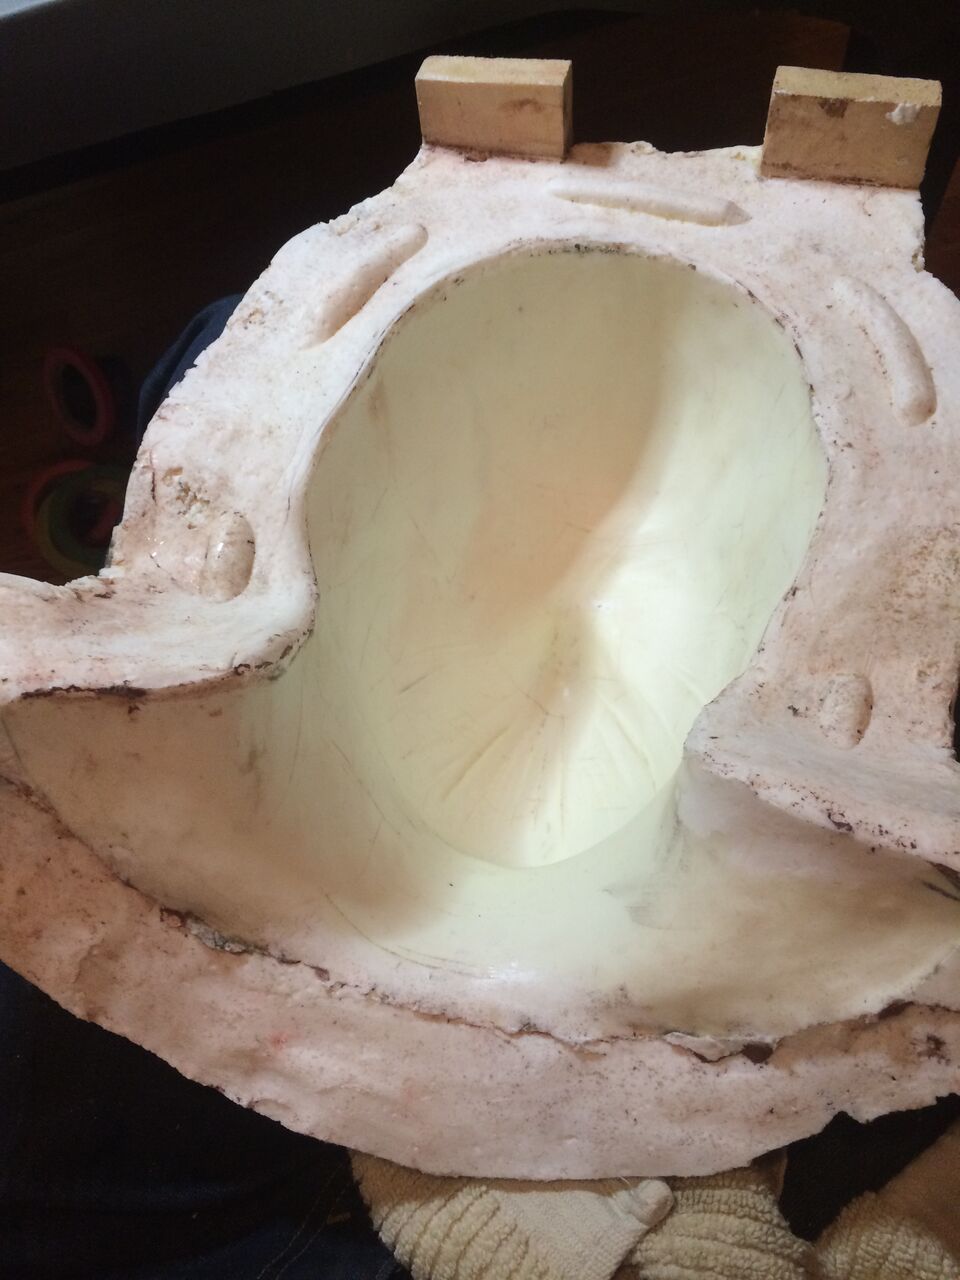
We made sure we had a totally cured front half before moving anything by allowing it to sit for at least 24 hours. Then its flipped over, the wood scraps and clay are removed. Some of the resin that squeezed out is removed and smoothed as well. You can see the registry slots carved into the front half in the second image.
The clay was scrubbed off of the resin and a coat of the paste wax was applied. The release agent spray then coats everything. You can see we added two pieces of the wood scraps at the top to fashion a stand for when t's inverted to add the silicone. Once everything was prepared we followed the same process as the front and created the second half of the resin mother mold.
second/back half of the mother mold
Again, we made certain everything was properly cured. We had to once again shave off some overflow so that the two pieces would separate. We said a prayer to everything holy that we did it right because taking it apart was about to ruin everything prior to this step.
So now that we had totally destroyed the sculpt, we had not the left but hope the negative mold took and move onto the final step.
STEP EIGHT: SILICONE MASK
This step was particularly exciting. The two washed and dried halves of the mother mold are ratchet strapped together to ensure a tight fit and the silicone is mixed.
Silicone comes in parts A and B and they are combined 1 to 1. It's better to do this by weight but without a scale we just used careful volume measurements. A few drops of the thickening agent was added to get the silicone to a spreadable consistency. A dab of the silicone pigment was added to give it a flesh base.
The thing that really gives it an authentic look, however is the flocking. It's a fiber that adds a bit of inconsistency to the solid-colored mixture like the properties of skin. We used a fair amount of flesh tone, and a dash of red and yellow until it resembles true flesh tone. A tiny dab of blue would have been nice in hindsight.
This mixture is then painted to the inside of the mother mold (a much better way to do this would have been to injection mold this so that it was totally consistent and form fitting, but that would have been substantially more costly and time consuming in preparation).
first coat of silicone
We did three coats. The final coat used more red flocking (as of it we deeper bloodier tissue beneath the lighter tissue). The first mask was a little messy, so we made an additional two masks learning as we went.
first mask prior to cleanup
STEP NINE: TOUCHUPS AND FINAL TOUCHES
The flashing (dingle-dangle crap hanging off at the seams) was trimmed carefully with a very sharp blade. Sanding didn't really work in our experience because the silicone was too elastic.
Baby powder was coated on the inside. This makes the mask less prone to sticking to the skin of the wearer, as well as soak up any residue from the silicone.
A few sources online indicated that diluting some clear silicone caulk and adding pigment to that mixture would make for a good compatible silicone paint, but we didn't have much luck with this.
We cut a few slits into the wrinkles of the mouth to provide breathing holes. Not a lot we could do for improving the vision though...
In the next post, I'll talk about my experience with movie blood that doesn't suck (which is strangely difficult to find pre-made).
–Tyler
*For any questions on this process, or our short film, Satori, feel free to hit us up over on our contact page.
**Special thanks to the fellas at Brink in The Yard Mold Supply for sharing their knowledge of all the materials needed throughout this process.


